Roof leaks, no matter how seemingly minor, should be taken seriously and treated with urgency. If left unresolved, even the smallest leaks can cause major damage. Problems like mold, rotted framing and sheathing, destroyed insulation, and damaged ceilings are just a few expensive and labor intensive issues that result from untreated leaks.
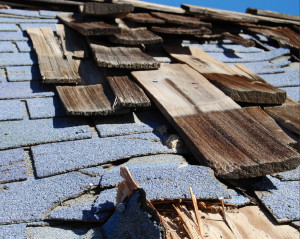
Although sometimes tricky, in most cases, you can isolate the source of the leak on your own with a few, easy tactics. By doing this, you can fix the problem yourself if it is small and manageable, or help provide information to a roofer who will assist you in resolving the issue. Assessing the source of a leak prior to having a contractor come out will put you in a better position to assess their quote. Even contractors admit that providing a quote for roof leaks can be tough because there can be many sources contributing to the leak; jobs are harder to quote when the solutions are unknown. Doing this research on your own can help assist in receiving a more accurate diagnosis and quote.
Telling signs of a leak
Sometimes you may not even be aware that your roof has a leak. The most obvious sign that your roof is leaking is water stains on your ceiling or an actual drip during inclement weather. Some other signs you can look for include: roof rot; missing, curling, or buckling shingles; and algae and mold accumulation. The first thing you want to do is confirm the source of the leak is indeed your roof. Other factors that may contribute to a leak include plumbing, roof scuppers, roof drains, or HVAC units.
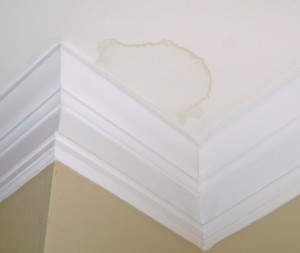
Once you have determined that the source is likely the roof, you can begin to locate the source of the leak on the roof. As with all home maintenance, you want to ensure you are taking proper safety precautions. Make sure that if you do access your roof, you do so on a day when your roof is dry, with a sturdy ladder framework and rubber soled shoes for traction. You need to make sure that power lines are not close by either.
Common Types of Leaks
Most roof leaks can be contributed to items penetrating the roof like chimneys, dormers, roof vents, or anything else that projects through the roof. It is rare that leaks occur without these items nearby, even in older roofs.
If you have attic access, enter it during a rain shower with a flashlight (wet spots reflect light) to locate where water is entering. You can also look for water stains, black marks, or mold if it is not raining. When the roof is dry, make your way up to examine the area above water entry in the attic. Most often times, the leak will be a few feet uphill from where water is entering the house, so make sure you examine all areas around the point of entry. Look for damaged shingles and objects penetrating the roof. If you cannot find the leak this way, recruit a helper to stand in the attic or house and begin running a hose in isolated suspect areas. Instruct the individual to yell or call you when they see signs of the leak. Since it can take a little while to see the leak inside, hold the hose steady for a few minutes in each isolated area before moving to the next one.
Vent Boots
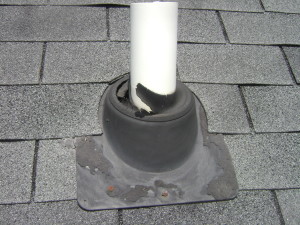 Vent boots can be all metal, or all plastic, or a combination of the two. Start by examining the base of the vent boot. If it is plastic you can look for cracks; if it is metal you can look for broken seams. If nails are missing or loose around the base, replace them with rubber-washered screws. If the base appears ok, check the rubber boot around the pipe to examine if it is rotted or torn. If it is, water will flow into the house alongside the pipe. In this case, you want to buy a new vent boot.
Roof Vents
 Roof vents, like vent boots, can be plastic or metal. In the case of plastic roof vents, look for cracked housings. If you have a metal roof vent, look for broken seams. Don’t caulk, it won’t last; just replace these. Also look for loose or missing nails at the base’s bottom and replace with rubber-washered screws.
Dormer Walls
The roof is not always the point of entry for water. Rains with heavy winds can actually enter the house above the roof in corner boards and siding. Dormer walls can provide openings for this to occur. Your caulk can be old, cracked or missing between a window edge and siding. 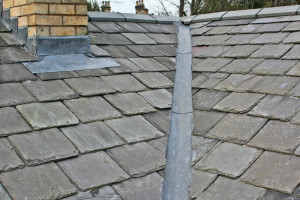 When this happens, water will go in through the crack, run behind flashing, and ultimately end up in your house. Sometimes caulk can appear ok but it is not sealed properly to adjoining surfaces. Check the area with a putty knife to ensure it is sealed properly. If debatable, dig it out and replace it with siliconized latex caulk. Check the siding above step flashing as well. If cracked, rotted, or missing, replace and make sure the new piece overlaps by 2 inches.
Although frustrating, taking necessary steps to examine the source of a leak can save you lots of time and money in the long run. Most often times, it is best to contact a professional to assist you. If you need help finding an accredited roofer or contractor, call your local Mariner Finance Branch and we can suggest one we work with. Lack of funds causing you to put off necessary repairs to your roof? Don’t worry; we can help with that too!
This material was prepared for general distribution. Although all blog posts are intended to be accurate, the information and third-party links provided in the Mariner Finance’s blog are intended for general knowledge and educational purposes only without any warranties, implied or express, of any kind. The posts do not constitute investment, financial or other advice. Authors may or may not be licensed financial professionals; for specific advice, seek the input of a licensed and trained financial expert.
